Simple Steps to Export Cox Emails in a Professional Way
Updated On - September 2, 2025 by Nasir Khan | Reading Time: 4 minutes
We all know that Cox has discontinued its email services and now only existing users through Yahoo! Mail can access their account. Cox Email was a webmail service provided by Cox Communications, a U.S.-based telecommunications company. If you are an existing Cox user but have now decided to export your emails and are looking for a way to easily export Cox emails, then you have landed at the right place.
Through this article, we will solve all your problems related to Cox emails and provide you with the best way to export Cox emails to Gmail, Office 365 or any other platform.
Why Do Users Export Cox Emails?
Before diving into the Cox email export process, let’s take a look at the reasons why users may consider exporting Cox emails. However, reasons may vary person to person.
1. Cox is Outdated
Cox has discontinued its webmail services and no new user-registration is possible. Only existing users can access their email account that too through Yahoo.
2. Moving to Updated Platform
Many users are exporting Cox emails to updated modern platforms like Gmail, Office 365, etc. to get a better email management platform and advanced features.
3. Backup for Security
By backing up your emails, you ensure that you don’t lose your important emails even after accidental deletion or a server outage. Backup in local storage provides you with an extra edge.
4. To Manage Storage
There may be a limitation to storing more emails in Cox webmail, so by transferring your old or unused emails, you can keep your important emails safe and keep free space in your server space.
5. Offline Accessibility
Even if you do not have internet access, you can still easily access your exported Cox emails. Email in a locally supported file format provides this accessibility.
Learn more about our Professional Regain IMAP to Google Workspace Migration tool
Here Are Two Methods to Export Cox Emails:
Here we will describe two methods to export Cox emails. But, let us make it clear: don’t try manual methods if you are not technically sound, because we also have a professional solution.
Method 1 – With Manual Ways and Workarounds
Using Outlook to Export Cox Emails:
- Firstly, open Outlook > File > Add Account.
- Now add your Cox email using IMAP settings. Then let it sync completely.
- Now go to the File > Open and Export > Import/Export.
- Select Export to a file > Outlook data file.
- Now, select folders to export and choose a location to save the file.
Using Thunderbird to Export Cox Emails:
Step1: Firstly, download Thunderbird if you don’t have.
Step2: Add Your Cox Email. Open Thunderbird.
- Now, click on Menu > New > Existing Mail Account.
- Then, enter your name, Cox email, and password.
- Use these IMAP settings:
- For incoming server: imap.cox.net, Port: 993, SSL: Yes
- For outgoing server: smtp.cox.net, Port: 465, SSL: Yes
Step3: Wait for Emails to Load
Your Thunderbird will start syncing your emails from the Cox server.
Step4: Export Emails
- Now, install the “ImportExportTools NG” add-on (search for it online or from Thunderbird Add-ons).
- Make a right-click on your Inbox >ImportExportTools NG > Export all messages in the folder > EML format.
- Lastly, select a folder on your computer to save your emails.
Drawbacks and Limitations of Manual Methods:
Emails are an important asset for anyone hence knowing the pros and cons of any method is a must. Be aware of the shortcomings of the manual method before moving ahead:
- For the manual method, you will have to be a complete technical expert; only then will you be able to do this process.
- While doing the manual method, just one wrong setting can make you lose your important data.
- Manual methods take lots of time and effort. It is like walking on egg shells.
- By exporting using the manual method, you may lose the hierarchy and structure of your folders.
Method 2 – Export with Professional Tool (Regain Cox Email Export Tool)
With the help of the Regain Cox Email Export Tool, you can perform all the export processes very easily and that too, with complete accuracy. To perform this export task, you need to follow some simple steps, which are as follows:
- Step 1: First, install the Regain Cox Email Export Tool on your computer system.
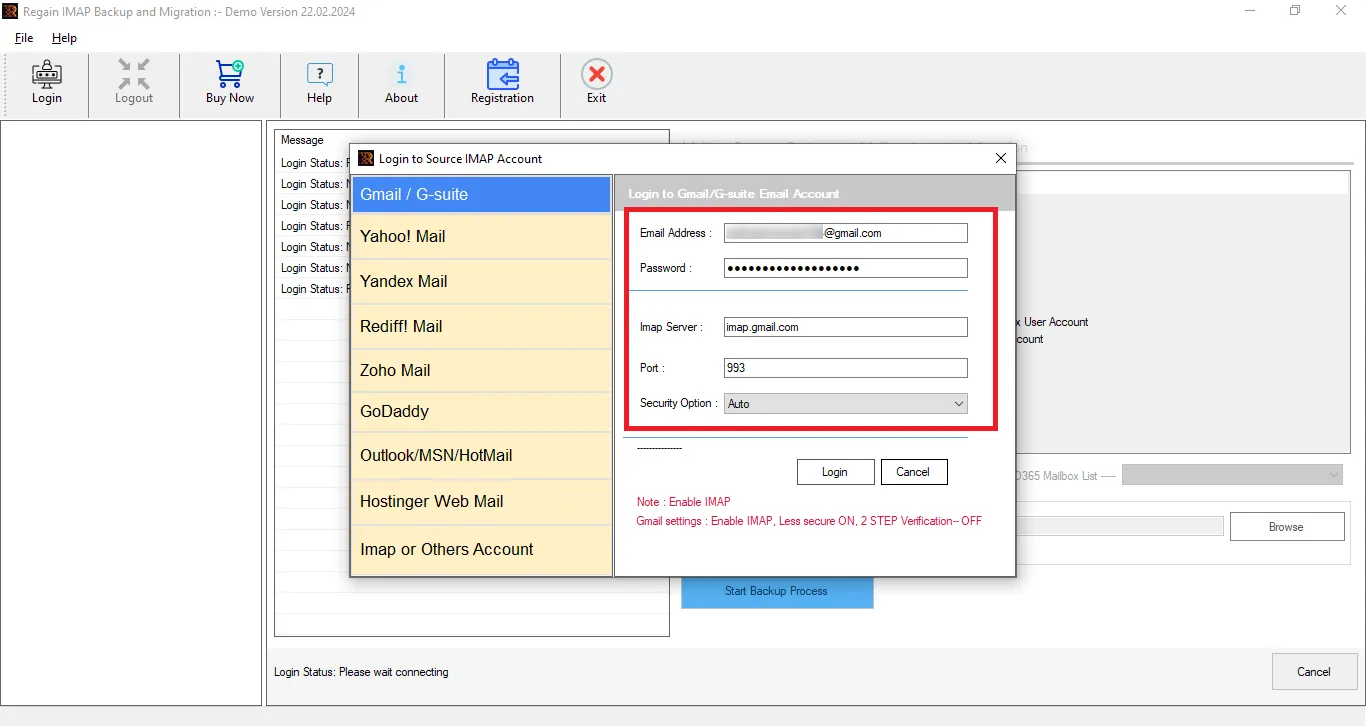
- Step 2: Now, enter the login credentials (like username, password, Post, and other things) of your account.
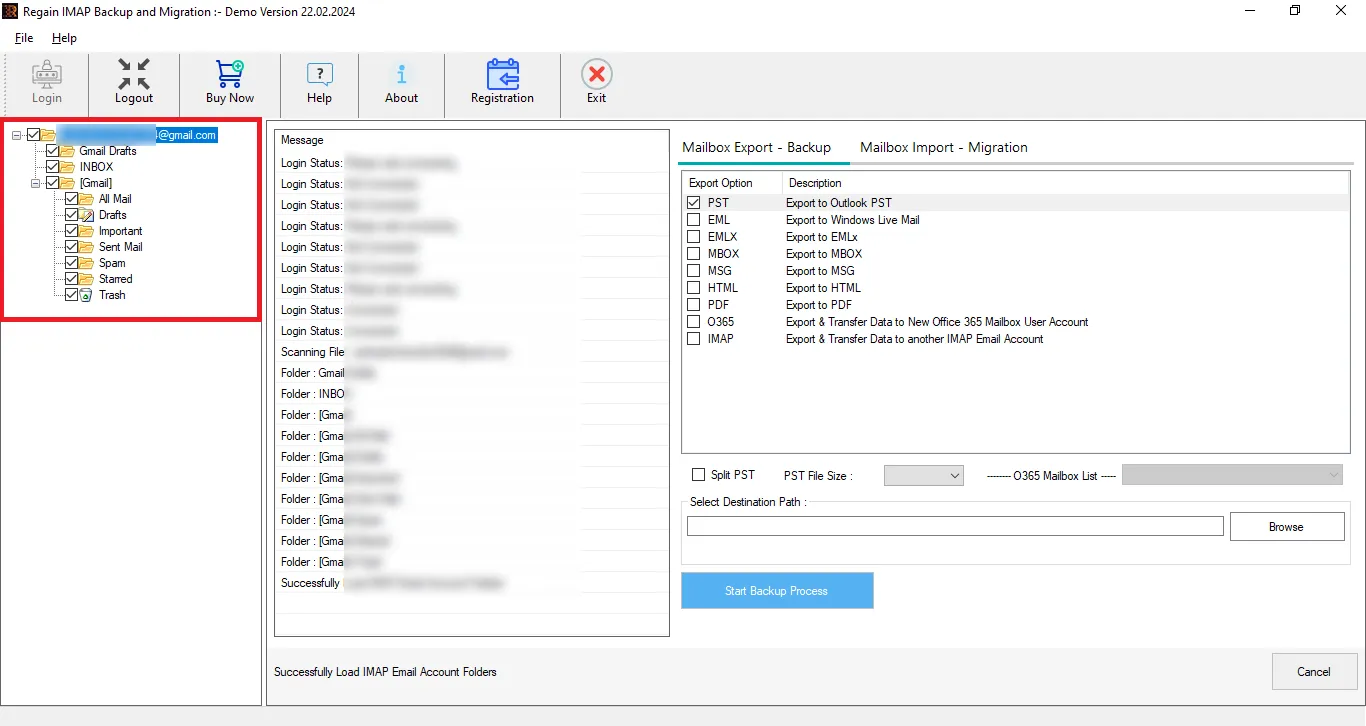
- Step 3: Regain Cox Email Export Tool will preview the folders; here you can also de-select the folders. Then, select the file format or cloud platform/IMAP server option as the target.
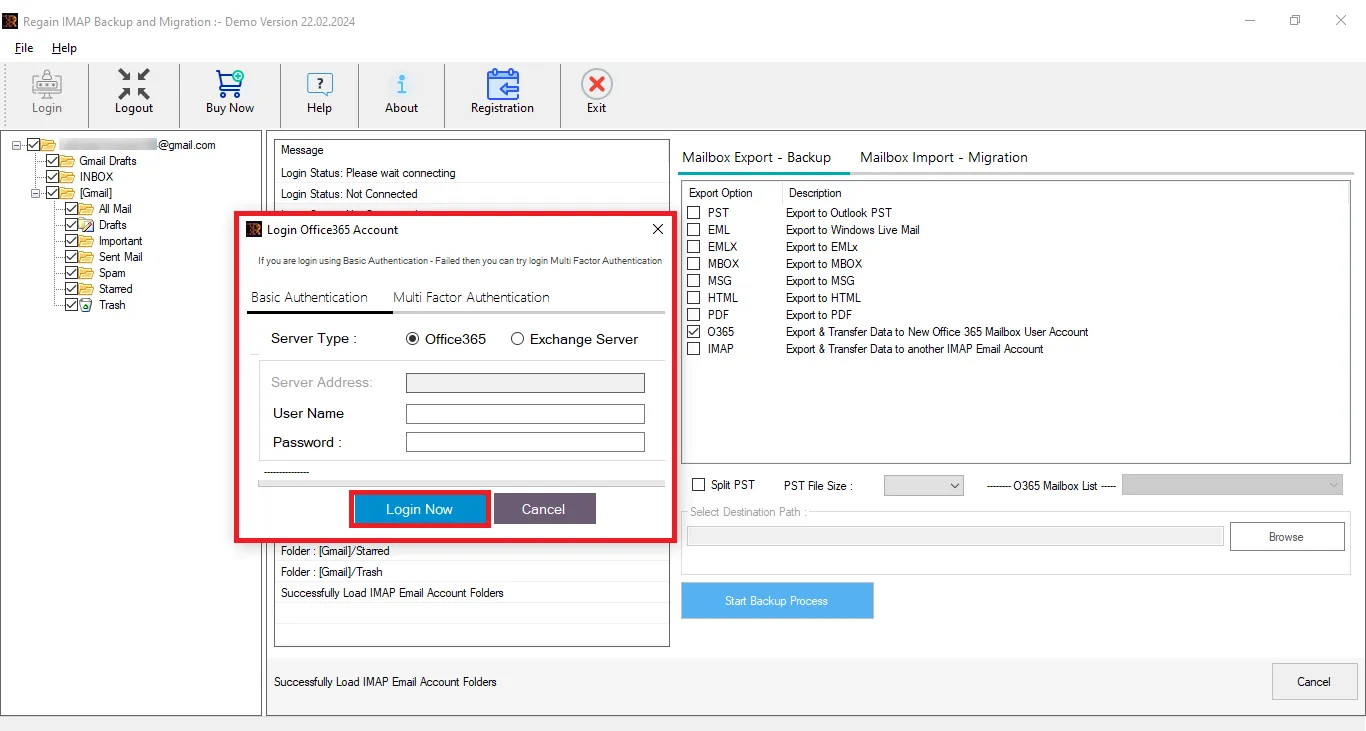
- Step 4: Now, enter the Target account credentials for cloud migration. If you want to save locally, then select the file format.
- Step 5: Move accordingly, and the Cox email export process will start.
Some Prominent Features of the Regain Cox Email Export Tool:
- Regain Cox Email Export Tool allows users to migrate emails from any IMAP account to another IMAP account (Yahoo, Zoho, Gmail, Outlook, etc.).
- It also facilitates saving into various file formats like PST, MBOX, EML, MSG, EMLX.
- Users will get the same email structure and folder hierarchy after exporting.
- Regain Cox Email Export Tool offers mailbox preview before exporting to select/deselect folders.
- The Regain Cox Email Export Tool supports all versions of Windows OS.
- You get a free demo version of the Regain Cox Email Export Tool.
- Regain provides free 24/7 technical support for any query.
Gist of the Blog:
In this article, we have given you an overview of Cox email and also discussed why users export Cox emails. You get to know about the manual method of exporting and also about its limitations. Additionally, we have introduced you to the Regain Cox Email Export Tool, which is tested by experts, and it will export your Cox email with the ease and accuracy. Users also get a free demo of this professional tool.
Related Articles:

